How to Install and Remove Copper SFP
Introduction
This user's guide provides information for Copper SFP transceiver modules, as well as instructions for installing, connecting and removing these transceivers.
Copper SFP transceivermodules are hot-pluggable - you can insert them into SFP module slots and remove them without interrupting the host system. Copper SFP Transceiver Modules: The SFP modules uses 3.3V power input and RJ-45 connectors.
Read the following guidelines before installing and using Copper SFP transceiver modules.
Handling Warning: Copper SFP are static sensitive. To prevent damage from electrostatic discharge (ESD), it is recommended to attach an ESD preventative wrist strap to your wrist and to a bare metal surface when you install or remove a Copper SFP module.
Safety Warning: Only trained and qualified personnel should be allowed to install or replace these modules, Dispose of your Copper SFP module according to all national laws and regulations.
Installing and Removing Copper SFP Modules
The Copper SFP module installation and removal procedures are described in this section.
Note: Disconnect all UTP (Unshielded Twisted Pair) cables before removing or installing a Copper SFP module. Do NOT remove and insert Copper SFP modules more often than is absolutely necessary. Doing so may shorten the useful life of SFP modules.
Installing a Copper SFP module
Follow the steps below to install a Copper SFP module.
- Attach an ESD preventive wrist strap to your wrist and to a bare metal surface.
- Remove the Copper SFP module from its protective packaging.
- Find the Copper SFP markings on the SFP module.
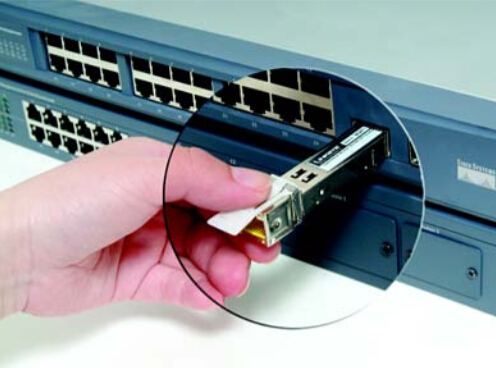
- Align the Copper SFP module in front of the slot opening.
- Insert the Copper SFP module into the slot until you feel the Copper SFP module snaps into place.
Connecting UTP Cables
Follow the steps below to connect UTP cables to the Copper SFP module.
- Insert UTP cable into the RJ-45 connector of Copper SFP module.
- Make sure to push UTP cable into the Copper SFP module with RJ-45 already latched.

Removing a Copper SFP module
Follow the steps below to remove an SFP module.
1. Attach an ESD preventive wrist strap to your wrist and to a bare metal surface
2. Disconnect the UTP cable from the SFP module.
3. Unlock and remove the Copper SFP module, as shown in the figures below.
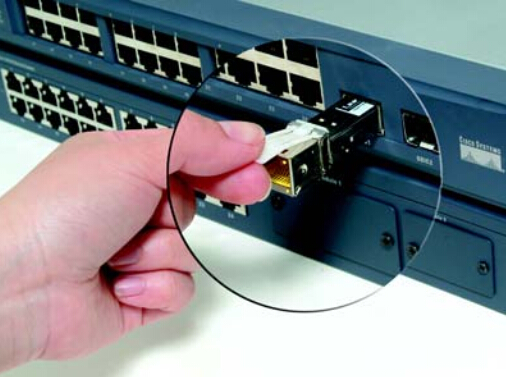
Pull out the latch and down to unlock the SFP module.
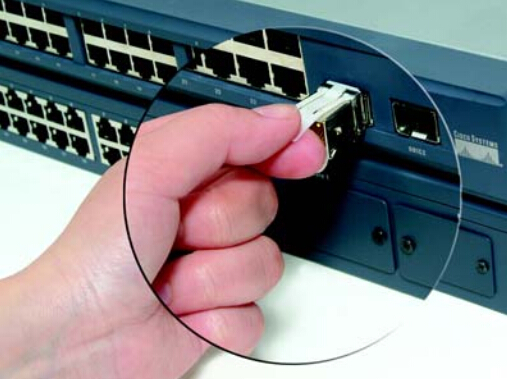
Using your thumb and index finger, grasp the tabs on both sides of the module and carefully slide it out of the slot.
4. Place the removed SFP module in the protective packaging or antistatic bag.
Recommended 1000BASE-T SFPs with RJ45 Interface
To save more money, I suggest to purchase SFP module form OEM manufacturer, such as Fiberstore Inc. The following list is recommended 1000BASE-T SFP transceivers.
- Cisco GLC-T, 1000BASE-T Copper RJ45 100m SFP transceiver module for Category 5 copper wire compatible with Cisco GLC-T SFP module.
- Cisco SFP-GE-T, 1000BASE-T Copper RJ45 SFP 100m transceivers are based on the SFP Multi Source Agreement (MSA).
- HP JD089B X120 compatible 1000BASE-T SFP copper RJ45 100m transceiver module.
- Netgear AGM734 SFP RJ45 compatible 1000BASE-T SFP Copper 100m.
- Linksys MGBT1 compatible 1000BASE-T SFP 100m transceiver module
- Finisar FCLF-8521-3 compatible 10/100/1000BASE-T transceiver Copper SFP 100m.